Feeds:
Posts
Comments

Posts Tagged ‘Western’

Dark Beer Braised Spareribs with Prunes

A friend was telling me about the Big Apple BBQ he attended a couple weeks ago at Madison Square Park and could not get enough of that good old Salt Lake City ribs.  This is an annual foodie event that symbolizes the height of NYC summer.  While most NYC inhabitants can’t afford a backyard and a grill, the best of the country’s BBQ joints come to them in a concentrated food fair and transform the green park into BBQ heaven.

Listening to my friend and remembering my own visit to the BBQ madness last year, I’m in the mood for some ribs.  With no grill at hand though, I decided to braise the ribs in a thick sticky sauce to get some of that finger-licking action going.

Dark Beer Braised Spare Ribs with Prune Recipe (Serves 2 Hungry People or 3 Normal Folks):

500-600g Pork Spare Ribs, rinsed and pat dry

3 Tsp Salt

2 Tsp Black Pepper

3 Tbs Sake

1/2 Onion (Diced)

1 Tbs Butter

1 Can (250ml) Dark Beer

50ml Water

1 Soup Bouillion (I used beef)

3 Pcs Dried Bay Leaf

5 Sprigs Fresh Thyme

10 Dried Soft Prunes (or more if you love prunes)

2 Tbs Honey

1/2 Tbs Soy Sauce

1-2 Tsp Whole Black Pepper (to be crushed roughly)

1/2 Tbs Olive Oil

  1. Combine the spare ribs, salt, black pepper and sake in a zip lock bag.  Mix well, squeeze all the air out and seal the bag tightly. Let the ribs marinade for 30 minutes or more.
  2. In a dutch oven (or pot), melt the butter under medium heat.  Add the diced onions.  Cook until soft and translucent.  Stirring to avoid browning.
  3. In a frying pan, heat olive oil under medium heat.  Add the spare ribs and brown them on all sides.
  4. Once the ribs turned into golden color, add them to the pot with onions, discard all oil in the frying pan .
  5. Add the can of dark beer, water, and bouillon into the pot.  Stir until well mixed.  Turn the heat to low, and let it simmer (with no cover) for 30 minutes.  If you prefer fall off the bone kind of texture, simmer for longer until the meat reaches your desired level of softness.
  6. Add the dried prunes and turn the heat to high to boil off excess liquid.
  7. Once the liquid reaches a sauce-like consistency, add honey, and hand-crushed pepper.  Mix well and turn off the heat.  Serve immediately.

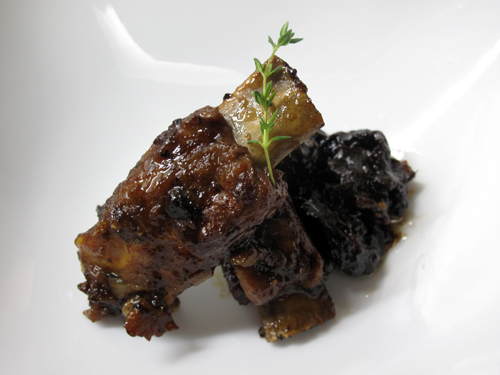
I served the ribs with rice and a side of frisee salad for dinner.  I wanted to have a slightly chewy texture for the meat to go with rice, so I braised the meat for just about 35 minutes.  J suggested that if I let it simmer for longer and make it a fall-off-the-bone kind of stew, then the dish can easily go well with pasta as well.  The prunes became sweet and savory goodies that explode with flavors in your mouth while the ribs and the thick honey-like sauce went perfectly with fluffy white rice.  The dish turned out to be so good that by the end of the night, after a movie break, J promptly finished the last 2 pieces of ribs.  Hm, ribs for main and ribs for dessert anyone?
Read Full Post »

green-peas-tomato-corn-salad

Spring in Tokyo is a lot warmer than I expected.  It is barely mid April but the weather is so gorgeous that I felt the urge to dig out my good old flip flops and have perfectly pedicured toes.  It is interesting that as I walked around Tokyo I noticed that not many people feel the same way. I still see a lot of people wearing winter jackets and knee-high boots and it seemed like I was the odd one who is embracing summer a tad too early. I can safely say, however, that more than half the men & women in NYC would be kicking it in sandals at this time of the year, so I am just being New Yorker in, um, Tokyo.

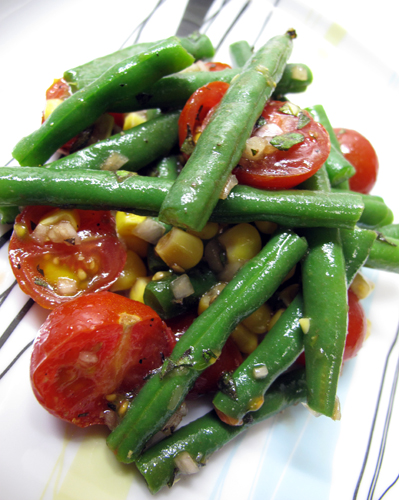
On a sunny day like today, as I was browsing through websites for dinner ideas, there is only one thing that I really wanted –  a refreshingly light salad. Making salads in Japan is pretty effortless. All the beautiful, perfectly engineered produce pretty much make the dish on its own. I especially love the cherry tomato here which is like mini bombs that burst with flavors and sweet juice.  I also used green beans as well as sweet corn to give it some color and texture. It is a super quick and easy salad and perfect for a breezy dinner at our balcony.

Green Beans Cherry Tomato Corn Salad Recipe (Appetizer Portion Serves 2):

10 Cherry Tomatos

15 String Beans

1/2 Cup Corn

1 Clove Shallot

1 tsp Fresh Herb (I used oregano since I had some at hand, but basil would work too)

1 Tbs Extra Virgin Olive Oil

3 Tsp Balsamic Vinegar

Salt and Pepper to taste

  1. Remove the stem and wash cherry tomato, then cut in half and put in a salad mixing bowl.
  2. Wash and cut off both ends of the green beans (1/4 inch).
  3. Finely chop the fresh herb.
  4. Bring a pot of water to boil, salt generously and boil the green beans until just cooked (about 3 minutes). Drain the beans immediately and pat dry with paper towel. Cut the string beans into 1.5 inch long pieces and set aside.
  5. Finely chop the shallot and put it in the mixing bowl with the tomato. Add olive oil, vinegar, salt and pepper and mix well. Let the mixture sit for awhile (15-30 minutes)
  6. When ready to serve, add green beans, corn and herb to the mixing bowl, toss well and serve.

I mixed the green beans and the corn into the salad last to avoid the vinegar staining the brilliant color of these ingredients. The tomato however, can sit in the dressing for quite a while to absorb the flavor without losing color. Originally, I was going to cut up a piece of fried chicken (leftover from KFC) and toss it into the salad, but J was too hungry and snacked on the chicken before I could stop him. Well, I guess ultimately it is better without the meat since I wanted to keep the salad light and refreshing.

If I serve this as a main then I certainly would have included grilled shrimp or chicken with the salad. However, knowing that J would be less than happy to eat such airy food for dinner, I also made a shrimp ragu pasta as a main to make him happy.  I will post that recipe later.

Read Full Post »

rosemary-chicken

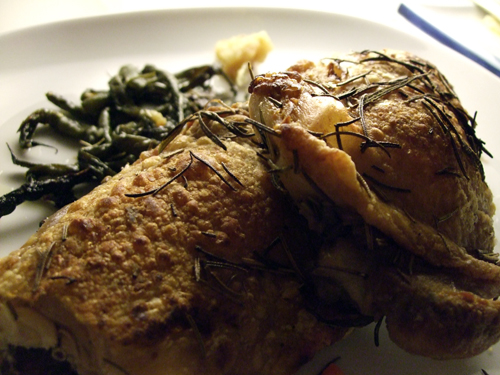
When J said let’s make roast chicken for the main course I was expecting a juicy, succulent piece of meat with glistering skin, more like a rotisserie chicken. It turned out that our micro-oven (our oven is the size of a microwave) is much stronger than we thought and the chicken became more like fried chicken minus the deep frying and all that oil (um, can we say JACKPOT?). Nonetheless, the chicken was still incredibly tender and juicy. Our guest H even claimed that it was the best chicken he has ever had.

Crispy Rosemary Crusted Chicken (Serves 3):

3 Pieces Chicken Thigh

handful of dried and fresh Rosemary

5 cloves of unpeeled garlic

5 tbs Olive Oil

Salt and Pepper

  1. Marinate the chicken with the olive oil, dried and fresh rosemary for at least 30 minutes, the longer the better.
  2. Preheat oven to 210 degrees Celsius.
  3. Wipe the oil off the chicken (very important!) and salt and pepper the meat.
  4. In a non-stick baking dish, spread around 1 tbs of olive oil.
  5. Put the seasoned chicken (skin up!) and garlic in a baking dish.
  6. Bake it for 25 minutes. Done!

This is a super simple and quick recipe. We also baked some green beans with the chicken in the oven (note the totally shriveled green thingy in the background), which we over-cooked by just a tad (oops!). The garlic popped right out of its shell and was soft and flavorful and perfect when smudged against a juicy piece of meat. The dish proves to be a yummy success and stood well as the final dish of J’s prix fix menu that night.

Actually the real ending to J’s prix fix was some desserts we brought from a famous patisserie called Toshi Toroizuka. It was DELICIOUS! If you have a chance, definitely try his fresh cream based desserts. Did I say it was D-E-L-I-C-I-O-U-S? Oh, here’s a picture:

Toshi Yoroizuka dessertWe bought 3 desserts but we were so eager to try them that the first two practically evaporated before I remembered to take pictures. Gotta be faster next time!
Read Full Post »

white-asparagus

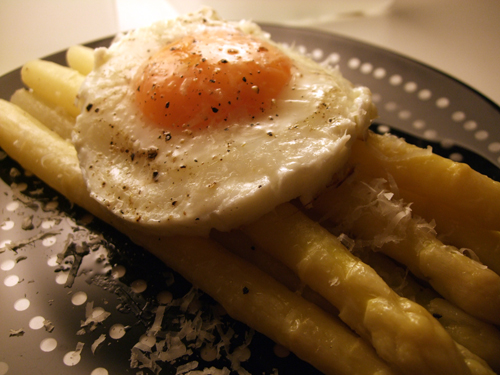
I made this appetizer after having a similar dish at an Italian restaurant recently. This recipe is so simple that I feel a little silly writing it but the final product tastes amazing! It’s definitely an easy dish to impress your guests.

Fresh White Asparagus with Sunny Sided Organic Egg Recipe (Appetizer size serves 3)

6-8 stalks of White Asparagus, blanched

1 Organic Egg

Parmesan Cheese, freshly shaved

Extra virgin olive oil

salt & pepper

  1. Peel the base of the asparagus (from approximately the half way point) until the tough outer layer is gone
  2. Bring a pot of water to boil, put in the asparagus and let boil for 2-3 minutes, drain immediately
  3. In a frying pan with medium low heat, warm some extra virgin olive, break the egg into a circular mold (if you want a perfectly round shape), cover lid.
  4. Once the egg white is set, and the egg yolk is still evidently oozy, turn the heat to high for 10 seconds and turn the heat off.
  5. In a frying pan with medium-high heat, warm some extra virgin olive oil and quickly sautee the drained asparagus, for 2 minutes.
  6. Plate the asparagus with the egg on top, salt and pepper to taste and finish with shaved Parmesan cheese.
  7. Cut open the egg yolk and shred the egg whites at the table, spread this gooey yummy mixture over the white asparagus and serve immediately.

This dish takes so little time to make but yields impressive result. I have had similar dishes in several different restaurants back in New York. It can be easily done with green asparagus. I have also had it with duck egg which is even more delicious but hard to find here. Enjoy!

Read Full Post »

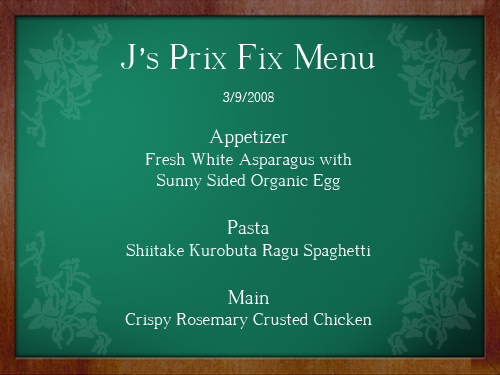
menu3

While I have blogged about the other J, the almighty Joel Robuchon, the J that I really want to blog about is the one at home. A few years ago, when J first cooked for me, he stuck to making one dish out of his William Sonoma cookbook each time. It was either one pasta dish, or one meat dish and that was all. Now I am not complaining, his food is as good as it gets in our quiet college town.

A few years passed and boy have we progressed. J and I (mostly J) are now cooking full on meals with 3 courses, and on special days, he even does it with wine pairing! I am going to share the recipes in the next few posts.

Read Full Post »